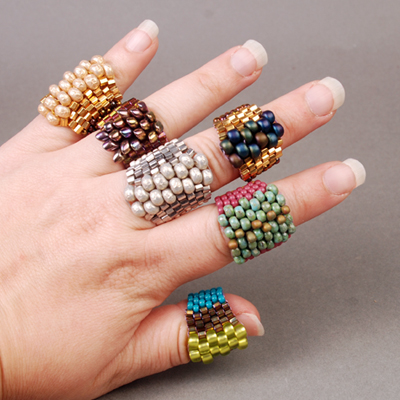
Beaded rings are quick, easy, and so cute! They're also a great way to use up extra beads that you might have left over from other projects. You will use peyote stitch and a variety of bead sizes to create this fun beaded ring. It's the perfect beaded treasure to whip up when you need a quick gift. The possibilities for color and bead combinations are endless and can be very addictive to start making! They're great for any season, and are flexible and comfortable to wear. We used several kinds of cut beads to add extra sparkle as well as the Miyuki Baroque beads to add a lustrous sheen.
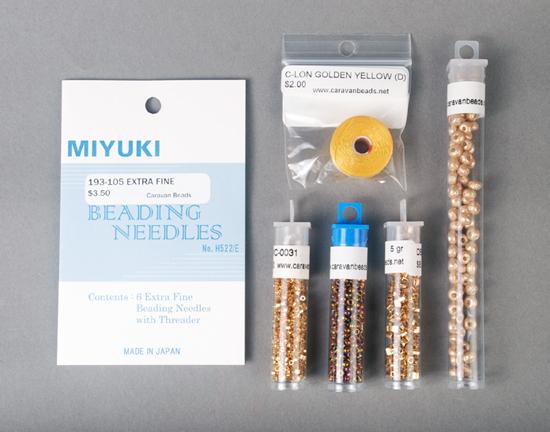
Supplies:
193-105: Japanese Thin Beading Needles
CLBD-GY: C-Lon Size D Golden Yellow
DBMC-0031: 24kt Gold Plated Cut 10/0 Miyuki Delica Bead - 1 tube
8-2449: 8/0 Transparent Tea Berry Gold Iris Miyuki Seed Bead - 1 tube
DBLC-0031: 24kt Gold Plated Cut 8/0 Miyuki Delica Bead - 1 tube
5-3953: 5/0 Gold Miyuki Baroque Bead
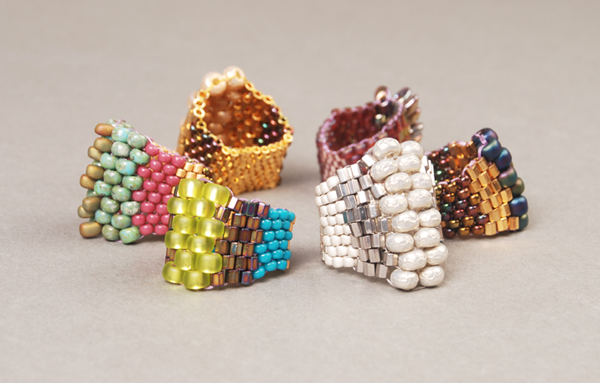
You will be working in Peyote stitch for this project. If you haven't worked in it before or need a refresher on how to begin, check out our page on peyote stitch for instructions.
Step 1: Pull at least 4 feet of thread off of your spool. Leave about 8-10 inches on the tail end. Using your medium Delicas (DBMC-0031) add 8 beads onto your thread.
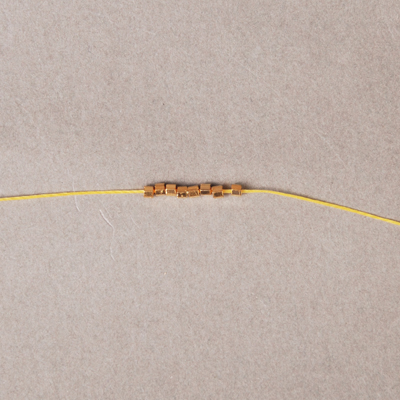
Step 2: Begin working in Peyote stitch. Pick up one bead with your needle. Look at the 8 beads already on your thread, skip the first bead and pass through the second bead. The bead you have added should now be sitting on top of the bead you skipped. (Tip: if you want a thinner ring 6 or even 4 beads can be used. Just be sure to use an even number of beads unless you are familiar with odd count peyote).
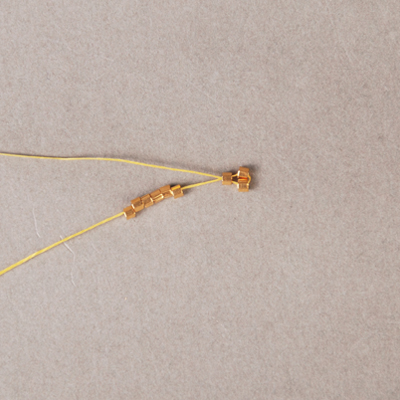
Step 3: Repeat the last step by picking up one bead, skipping the next bead and passing through the following bead.
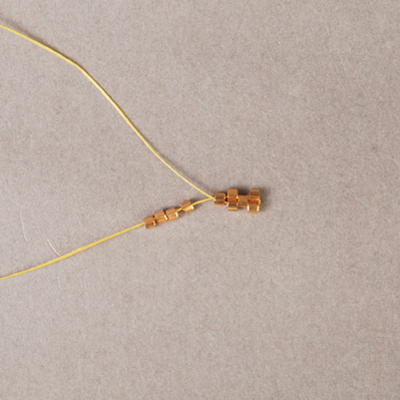
Step 4: Repeat again.
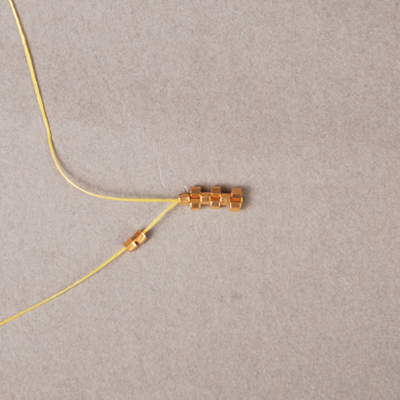
Step 5: Repeat again by passing through the last of your 8 original beads. You should now see four beads sticking up above your other beads.
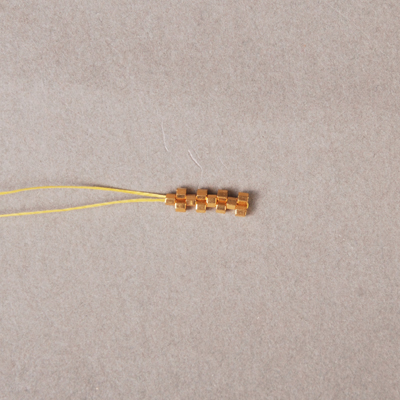
Step 6: Continue in peyote stitch by adding a bead into each lowered space and passing your thread through each raised bead to secure. You will be adding four new beads per row. Continue for about 10-12 rows depending on desired ring size. You can always add more length to this section at the end of the project, so don't worry if your not sure how long it should be.
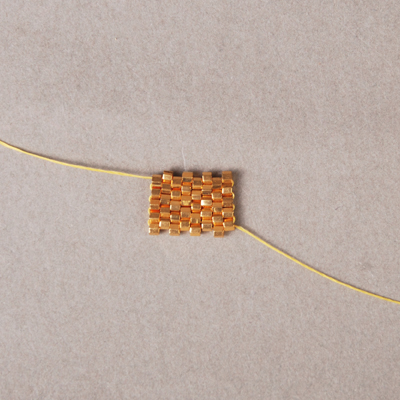
Step 7: Begin the next row in the same way except now adding four of the size 8/0 beads (8-2449).
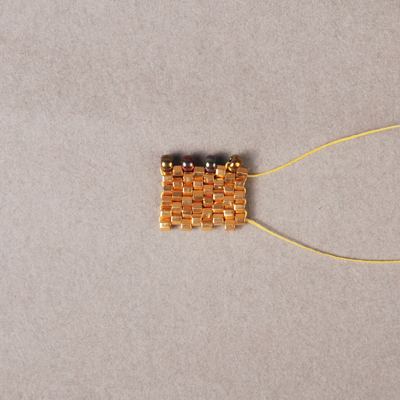
Step 8: As you add the next row of 8/0 beads you will see the ring begin to flare out and become wider. Try to keep your tension firm and even as you move from one bead size to the next.
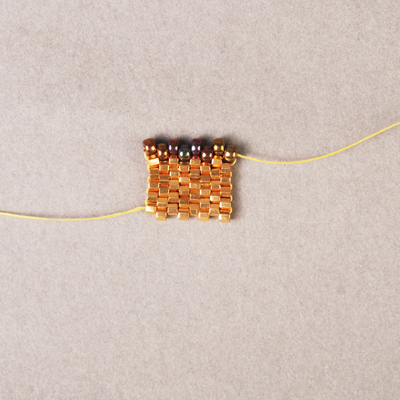
Step 9: Continue with the 8/0 beads for six rows. If you lose count just count up the edge of your ring. There should be three 8/0's on each edge.
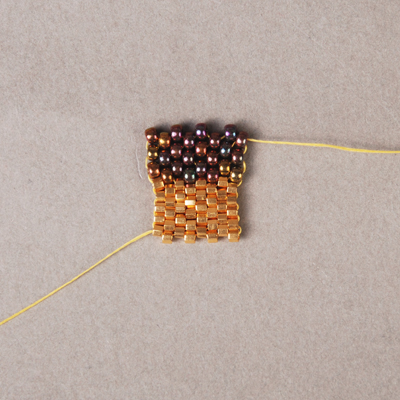
Step 10: Begin the next row using the large Delica beads (DBLC-0031)
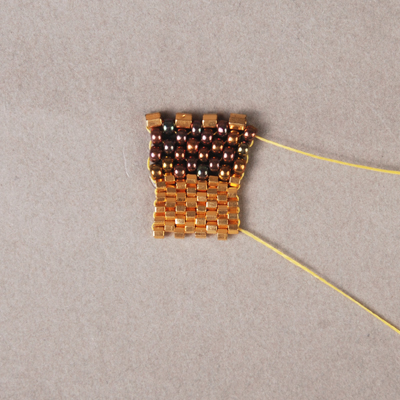
Step 11: Continue adding large Delicas, again be mindful of your tension as you transition to the larger beads.
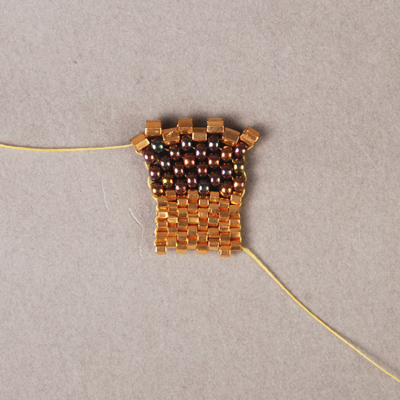
Step 12: Add beads until you have six rows.
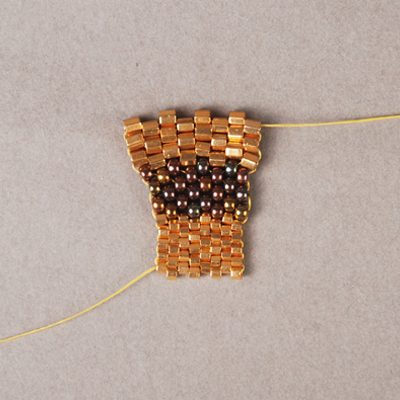
Step 13: Change to the size 5/0 beads for your next row.
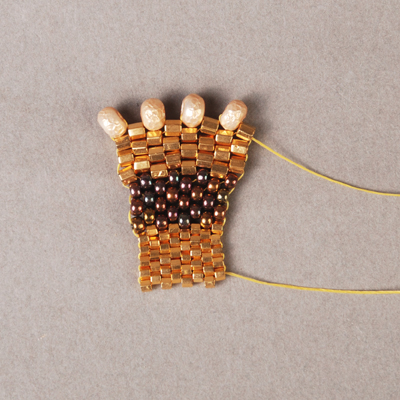
Step 14: Pay extra attention to your tension as the 5/0's can be difficult to keep tight because of their size and the larger holes.
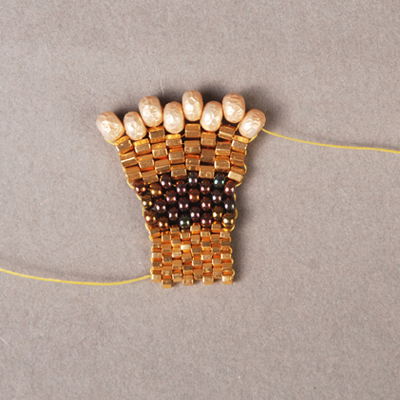
Step 15: Complete four rows in the 5/0 beads.
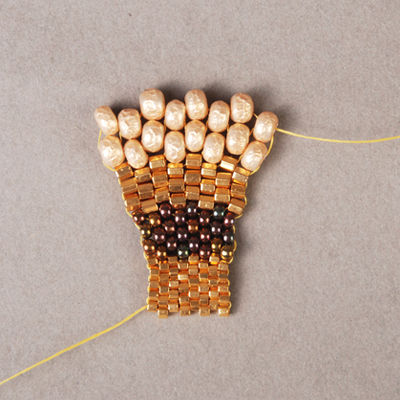
Step 16: At this point you will now begin to reverse the pattern. As the bead size now decreases you will find the larger beads bubbling up. This is good! It means your tension is nice and tight.
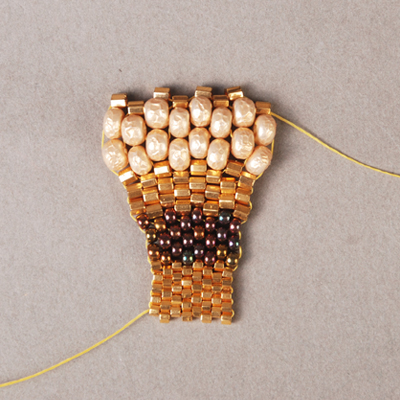
Step 17: Take extra care to keep this tightness as you continue to decrease.
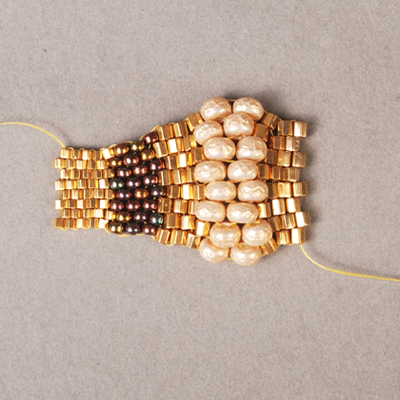
Step 18: Continue adding beads to match the pattern of the first half of your ring.
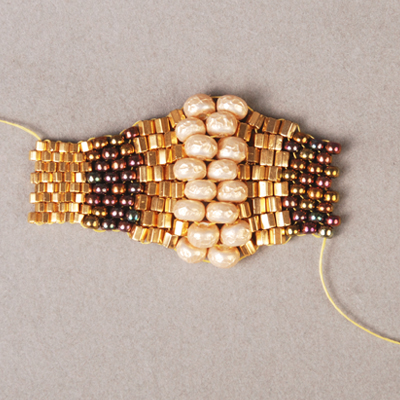
Step 19: Once you have gone back down to the medium Delica beads, check the length and decide if you need to shorten or lengthen your ring.
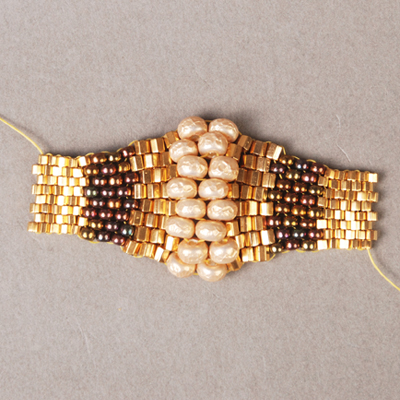
Step 20: When you are ready to sew your ring together just make sure that your ends fit together like the teeth of a zipper (alternating back and forth) so it will appear seamless when sewn up. If it does not fit together in this way you will need to either increase or decrease one row on one side.
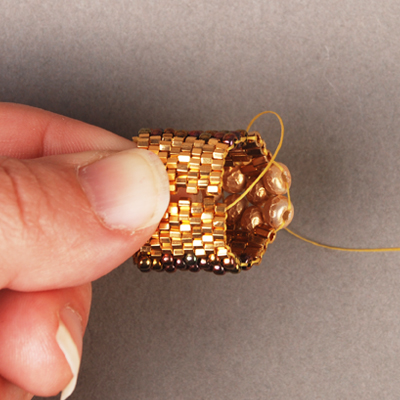
Step 21: At this point I like to sew in one side of my thread. If you are short on thread on one side, sew it in and use the longer thread to attach the two sides. Join the two ends together using a running stitch. The thread will snake back and forth between the two sides.
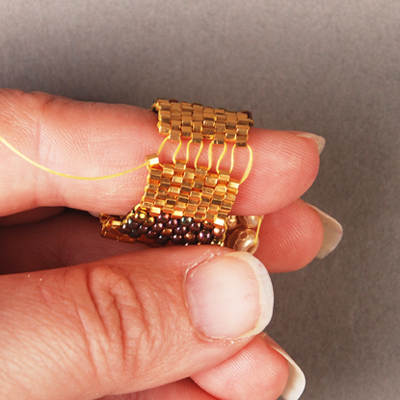
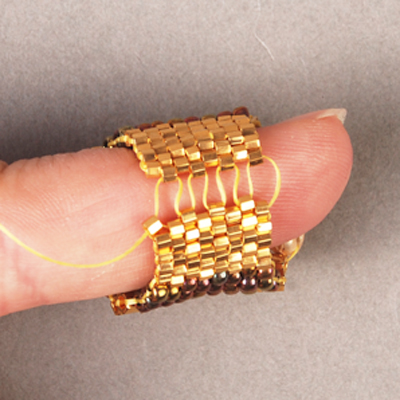
Step 23: Pull tight as you connect and then reinforce by sewing in the tail of your thread along the seam and through the surrounding beads.
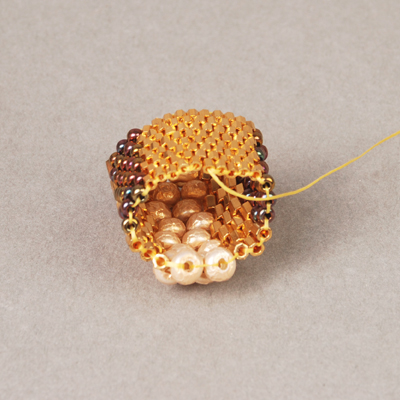
Step 24: Trim off remaining thread.
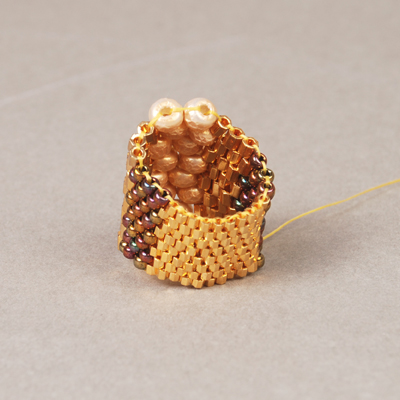
Step 25: You're done!
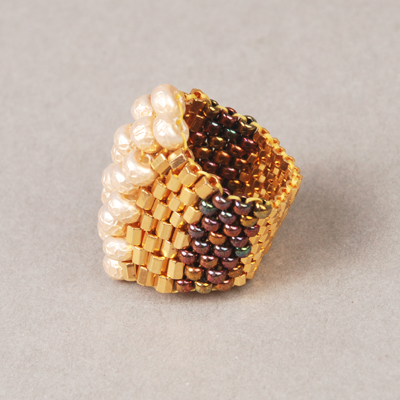
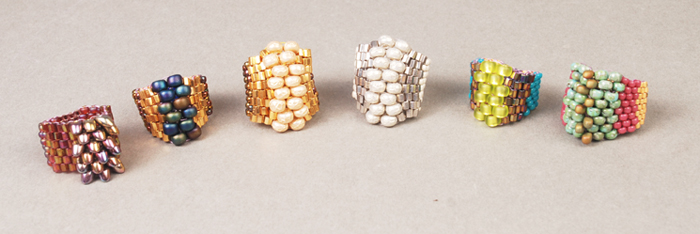
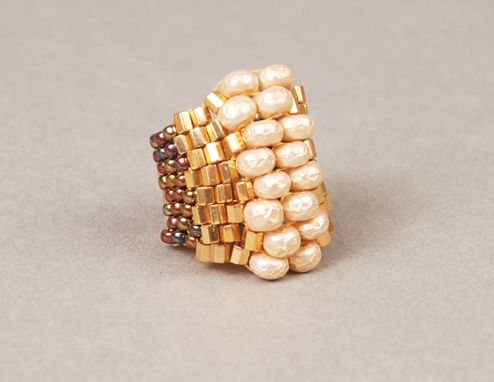
You can work in a variety of bead sizes or shapes. Try using Long Magatama beads instead of the size 5/0 beads for a cool dragon scale effect.
