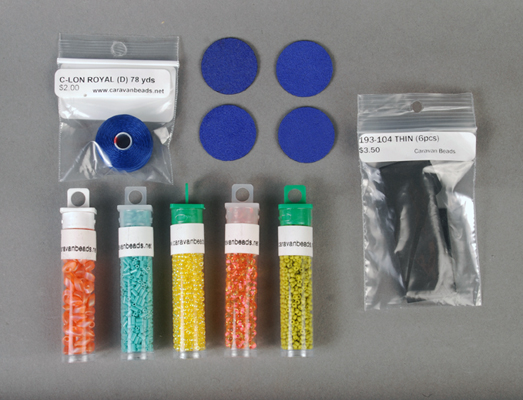
Materials List:
UP-0051: Ultrasuede Earring No. 1 in Zodiac
193-104: Japanese thin beading needles
CLBD-RO: C-LON Royal Blue Size D
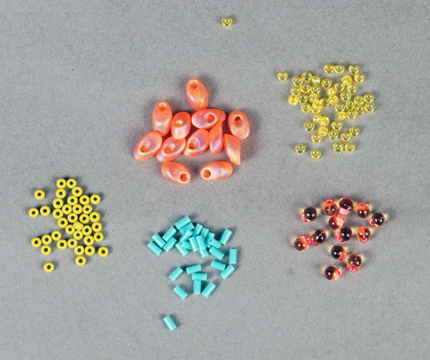
DPF-50: Miyuki 3.4mm Drop Bead Electric Pink Lined Lt Topaz - 1 tube
11-252: 11/0 Tr Yellow AB Miyuki Seed Bead - 1 tube
11-2316: 11/0 Matte Op Lime Miyuki Seed Bead - 1 tube
15-481: 15/0 Op Turquoise Green AB Miyuki Seed Bead - 1 tube
15-177: 15/0 Tr Cobalt AB Miyuki Seed Bead - 1 tube
LMA-138FR: Miyuki 4x7mm Long Magatama Matte Tr Orange AB - 1 tube
BGL1-412: 3mm Miyuki Bugle Bead Op Turquoise Green - 1 tube
E-600 glue
Earwires (one pair)
Two 4mm jump rings
For this project I will be working with Miyuki seed beads, drops, long magatamas, and bugles. There are lots of wonderful patterns and designs you can make with the variety of bead shapes and sizes available. I have selected Ultrasuede earring No. 1 in Zodiac for our beading material. This is a 1” diameter circle and comes with four pieces, providing the front and backs for one pair of earrings.
Step 1: Cut a length of beading thread, approximately 36” long and tie a knot in one end.
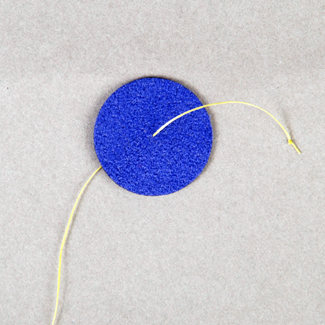
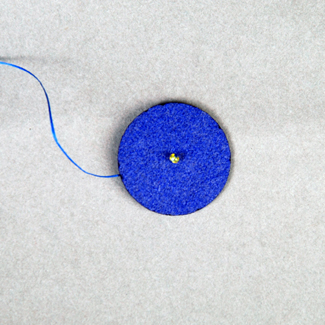
Step 2: Pierce the center of the Ultrasuede material with your needle and pull through until your knot catches on the backside.
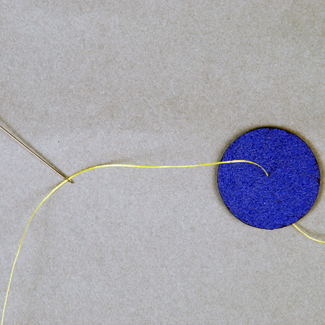
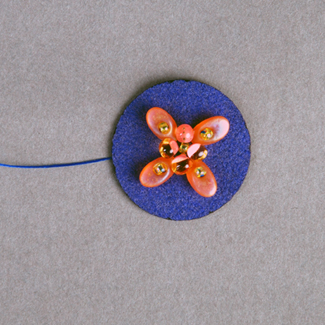
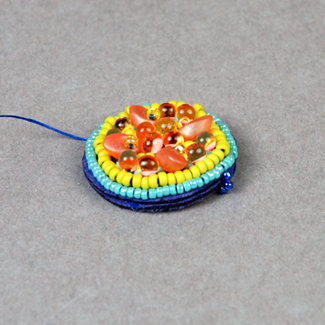
Step 3: String on one 11/0 seed bead. Stitch the center bead onto the material by sewing the thread back down through the Ultrasuede
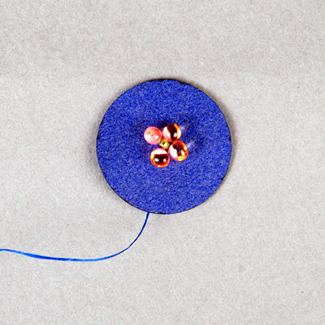
Step 4: Add your next bead by inserting the needle up through the Ultrasuede right where you want the bead to lay. Put on one drop bead and bring the needle and thread back down through the suede.
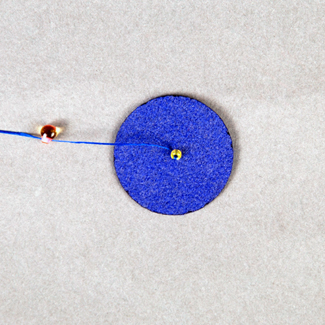
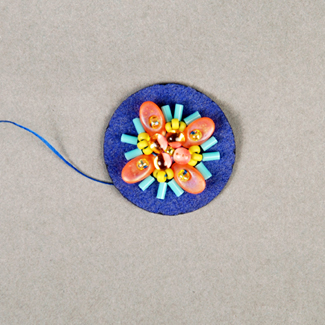
Step 5: Stitch in this same manner until you have four drop beads surrounding the center 11/0 seed bead.
Step 6: The next set of beads will be the long Magatamas. These are so fun to work with! They add a great dimension to your beadwork. To stitch this bead down string up through the hole and add an 11/0 seed bead to anchor the bead in place.
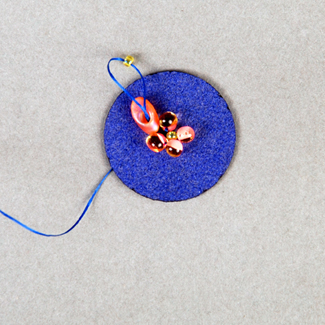
Step 7: This shape of bead looks different on each side because it is cut at an
angle. Be sure to stitch all the beads down on the same side.
Step 8:Next add three 11/0 seed beads in between each long magatama. For this row pick up the three beads in one pass and stitch all three down together.
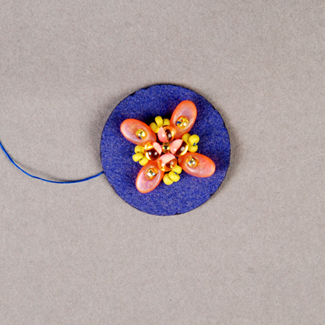
Step 9: For the next row add 3 bugle beads in between each Magatama. These look great radiating out from the center.
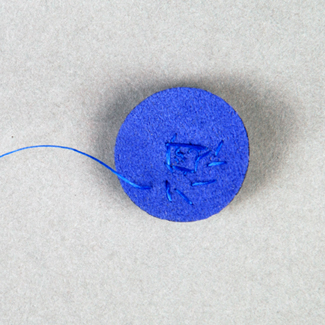
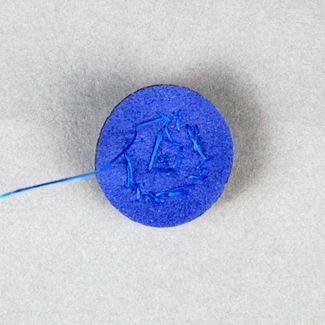
Step 10: Here you can see the back of your beadwork and all of the thread passing from one row to the next. Don't worry if it looks messy it will be covered up at the end.
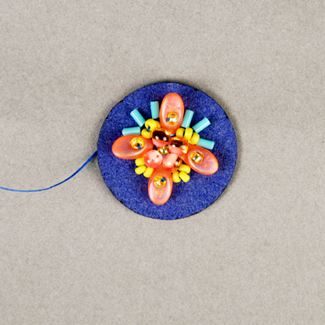
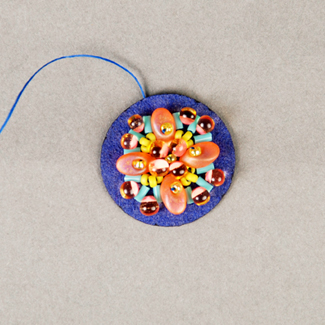
Step 11: Add the rest of your bugle beads. Use the beads from your previous rows to help keep the beads your adding evenly spaced.
Step 12: Add a drop bead in between each of the bugles.
Step 13: Another view looking at the back of the Ultrasuede. This will be covered up when we attach the backing piece of Ultrasuede. Notice how beautifully the thread matches the material. The C-Lon thread is available in 36 colors making it easy to find the right color for your beadwork.
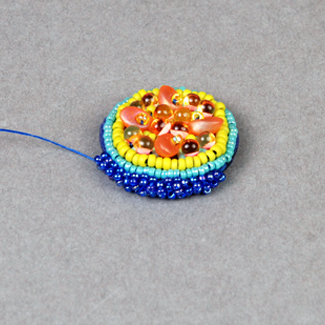
Step 14: Stitch on a row of 11/0’s to surround the center design. To add a row of beads like this in bead embroidery we use what is called backstitch.

Stitch on four beads at once and then bring your needle back up through
the beads approximately two beads back. Stitch your thread through the
two 11/0’s and then add the next four beads. This helps to anchor your
beads and make them look like one continuous string of beads laying
nicely side by side.
Step 15: Complete the front of your piece by backstitching on a row of 15/0’s.
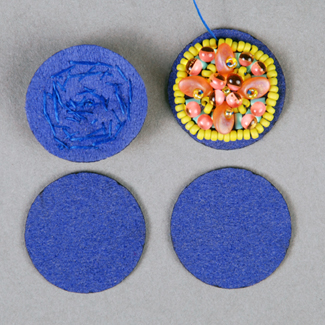
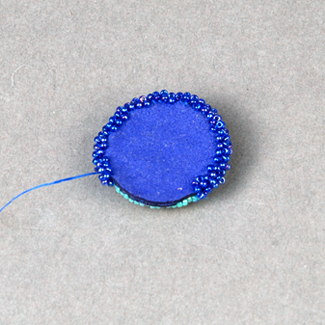
Step 16: Here you can see the front and backs of the Ultrasuede before they are glued together.
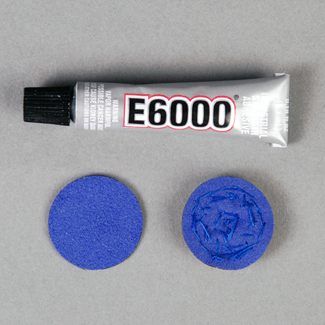
Step 17: E-6000 is an excellent adhesive to glue the two Ultrasuede pieces together. It is a clear epoxy and remains very flexible even when dry. A little goes a long way, I usually add some to the center and spread it out to the edges.
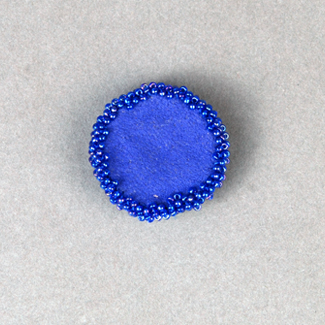
Step 18: Once the two pieces are glued together you can begin the edging that will make the project look neatly finished. Start with a new piece of thread (Approx 36" long). I chose to work with a “rolled edge” for this project. This is similar to a whip stitch.
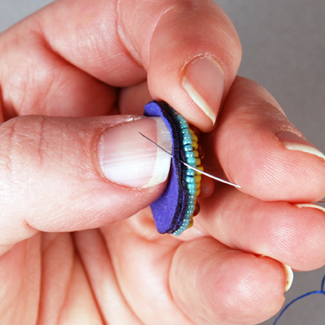
Step 19: Tie a knot in the end of your thread and start by putting your needle between the two layers of ultrasuede right at the edge. This way your knot can be hidden. Your needle should be coming out of the backside of the piece.
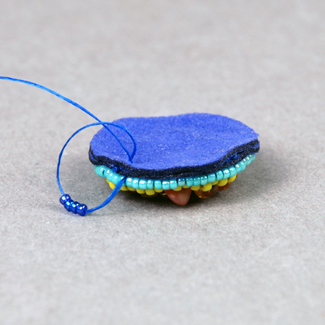
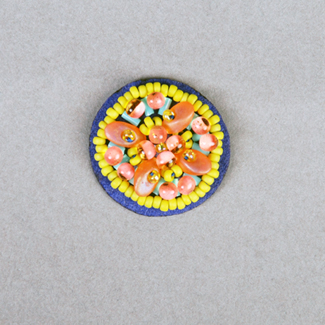
Step 20: String on four 15/0’s and bring your needle back through both layers of ultrasuede creating a loop around the edge.
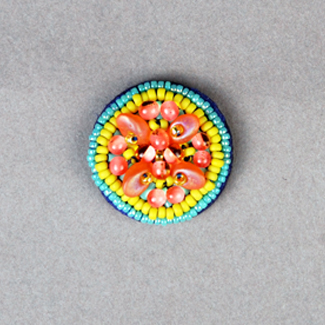
Front View
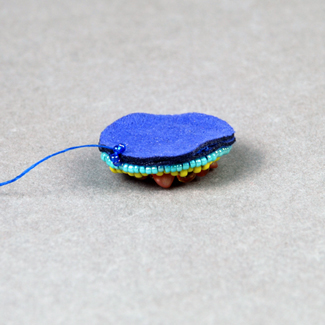
Step 22: Each row of beads will line up next to each other.
Step 23: Continue around the edge of the earring.

Front view
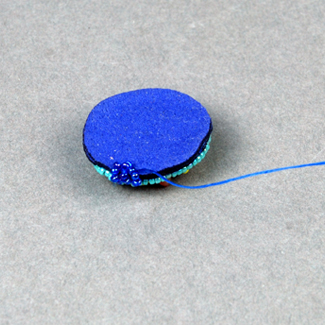
Step 24: Continue until the edging is complete.
Step 25: To finish your thread simply sew back into your beads until secure and trim.
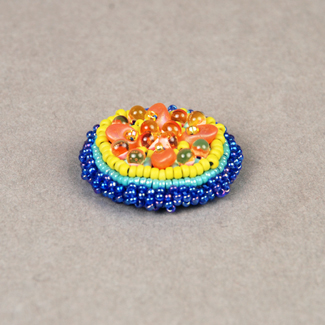
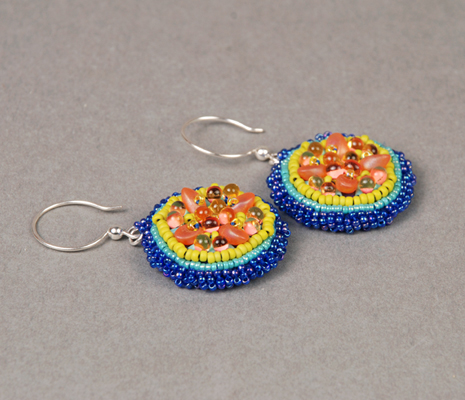
Step 26: Ta Da! To complete your earrings slip a jump ring under two rows of 15/0’s on the beaded edge. Add your earwires and admire your work!
Tips:
You can always add another pass through your beads to help them lay flat. The extra thread can fill up the holes in the beads and add some additional structure to the piece if the beads feel loose.
Try to keep nice even tension as you stitch on your beads. My tension probably tends to be a little tight, which can be good in most beadwork applications, but pulling too tightly when doing bead embroidery can result in the Ultrasuede material bunching up. Your beads may start to buckle as well and won’t lay nicely next to one another.
You can lay your threaded beads down across the material before you stitch them down to get an idea of how much room they will take up.
There are several excellent books available with more detailed instructions. I would recommend The Art of Bead Embroidery by Heidi Kummli and Sherry Serafini