Beaded Kumihimo Instructions
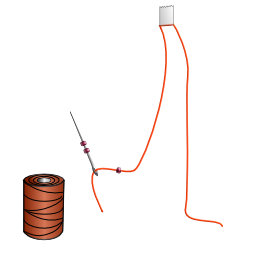
Cut C-Lon cord to length. Place a piece of tape at the center of the cord. Use a big eye needle to string on one side of beads.
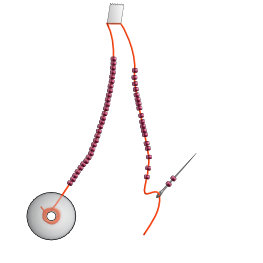
Once the beads are strung, wind the extra cord around the bobbin. Add the big eye needle to the end of the other side of the cord and string on the next set of beads.
Repeat until you have four sets, for a total of eight bobbins.
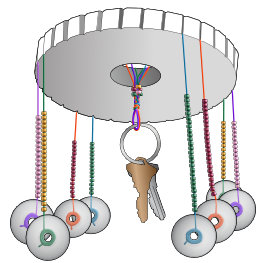
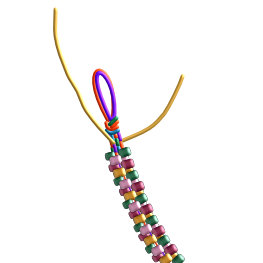
Holding the cords by the center, remove the tape. Be sure not to set down the bobbins as your beads may slide from one side to the other. Make an overhand knot with a small loop at the top.
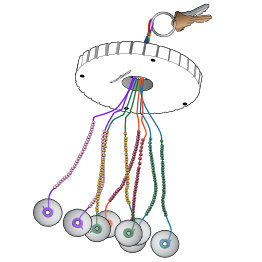
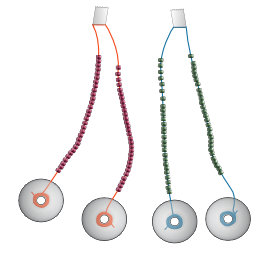
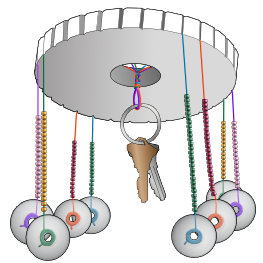
Put the loop through the front of the kumihimo disk. Attach a small set of keys (two or three keys maximum) to the loop.
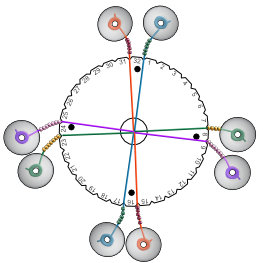
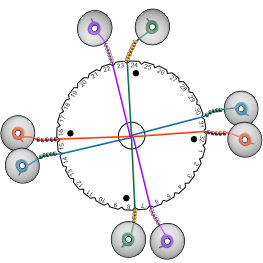
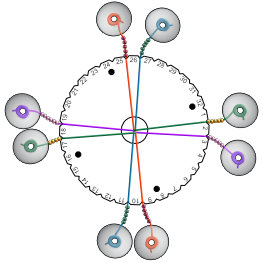
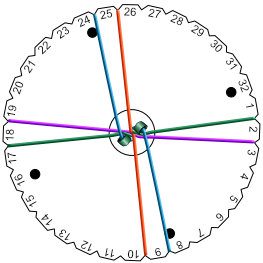
Arrange the cords on the top of the disk, one cord on either side of the four dots. Slide the cords into the slots on the disk, the foam of the disk keeps the tension even as you braid.
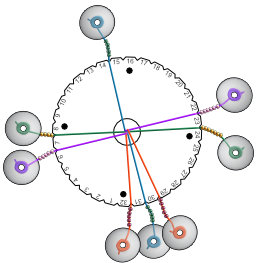
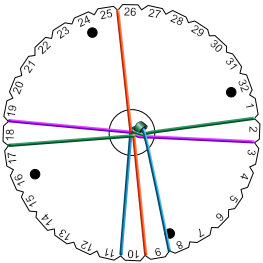
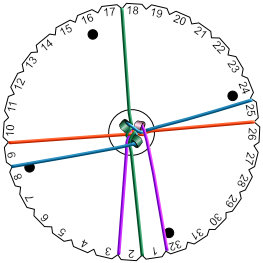
Begin braiding without beads to create a secure end. Bring the cord at the top right hand side of the disk down to the bottom right, placing it in the slot just next to the bottom right cord. You should have three cords at the bottom of the disk.
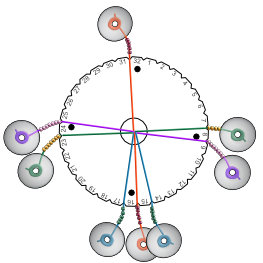
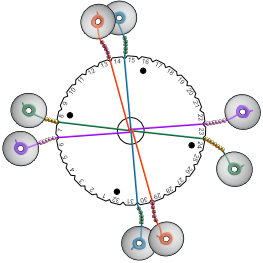
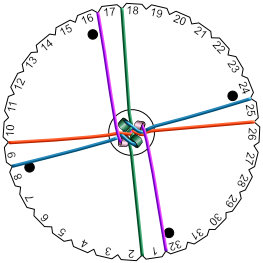
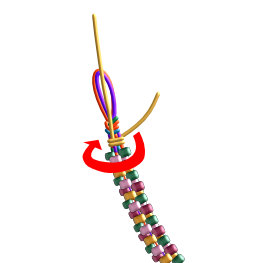
Pick up the bottom left hand cord and move it to the top left side, putting it into the empty slot just left of the single cord. Rotate the disk 90° to the right.

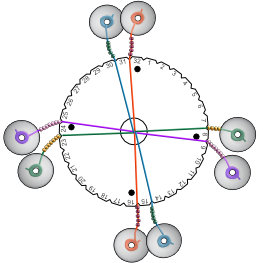
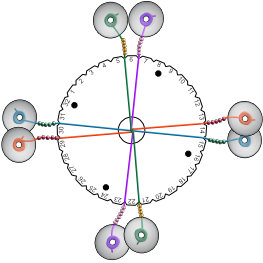
Take the cord from the top right and move it to the bottom right position. You will have three cords at the bottom of the disk.
Move the cord from the bottom left to the top left position. Rotate the disk 90° to the right.
Note: If you need to set down the disk, make sure you leave it in the position just after moving the top right hand bobbin to the bottom right. This creates three bobbins in a row and makes it much easier to see which cord is moved next.
Take the top right cord and move it to the bottom right position.
Take the bottom left cord and move it to the top left position.Rotate the disk 90° to the right.

Move the cord from the top right to the bottom right position.
Move the cord from the bottom left position to the top left position. You have just completed one full round of braiding.
Continue to braid without beads for another full rotation, or until there is about 1/4" braided.
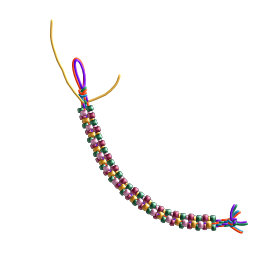
Once one end is secured by braiding, it's time to start adding beads. Be sure to let the braid hang freely without pulling or holding it from underneath - this can change your tension and create an uneven braid.
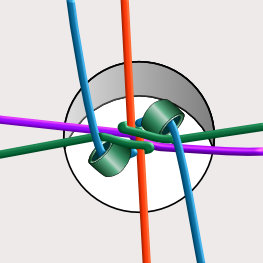
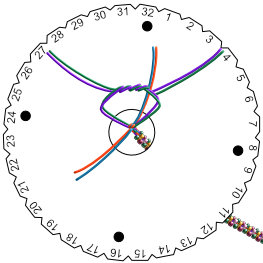
Picking up the top right hand cord, slide one bead down the strand to the point of braiding. The edge of the bead should nestle just underneath the first strand to the right so the hole is visible from above the disk. Place the cord into the bottom left hand slot to secure the bead.
Detail of the edge of bead catching on the cord. After a few rounds of braiding with beads, the beads will sit straight as they will have a base to stack upon.
Repeat with the bottom left hand cord, sliding the bead down and underneath the first left hand cord. Move the cord to the top left hand position. Rotate the disk 90° to the right.
Notice that the beads placed diagonally opposite each other during setup will be opposite each other in the braid.
Continue to add beads to the braid, being careful the edge of each bead stays underneath the cord perpendicular.
While braiding, watch out for beads popping out from their position. They will slide into the center of the braid creating a visible gap in the beads.
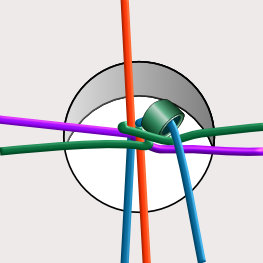
As you add beads, the braid will lengthen down the hole in the center of the disk.
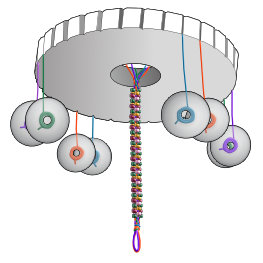
Once your braid is finished, braid without beads for another two full rotations to secure the beaded section.
Take the two cords that would be braided next and trim off the bobbins, making sure to leave enough cord to make a surgeons knot. A surgeons knot starts like a square knot, right over left, but double the wrap for left over right. Tighten the knot. Place the cords just knotted back into the slots to keep them out of the way for the second knot.
Pick up the unknotted cords, trim off the bobbins leaving enough cord to make the knot. Repeat the surgeons knot. Remove the braid from the disk.
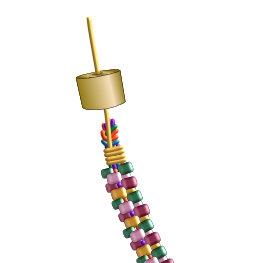
Take a 4" piece of wire and gently press it through the center of the braid as close to the beads as possible.
Bend it gently into an "L" shape with the longer end pointing straight up away from the braid.
Using flat nose pliers, tightly hold the longer piece of wire against the knot so it cannot spin and wrap the shorter piece of wire around both the cord and the longer end of wire. Wrap upwards towards the knot.
After completing the wrap, check to make sure the knots are still tight, and tighten if necessary. Using Hypo-Cement, glue the knot and trim off the ends.
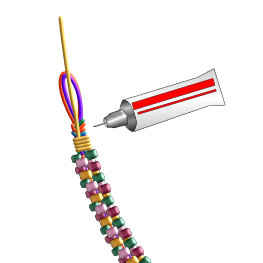
While the glue is still wet, slide the cone down the wire and over the knot. Press firmly to get it as snug up against the beads as possible.
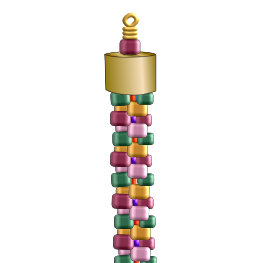
Slide one accent bead down the wire and make a wrapped loop. Be sure the cone is as tight against the beads as possible before starting the wrapped loop.
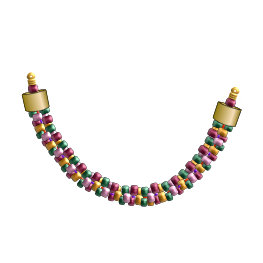
Repeat for the opposite end.
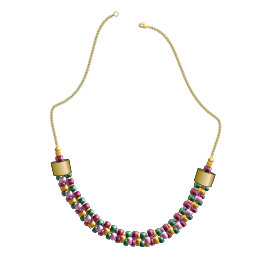
Attach a clasp or chain to the wrapped loops to finish.
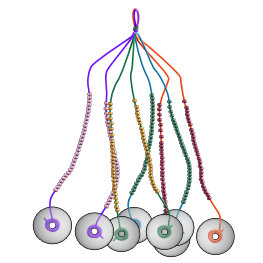
Try these free Kumihimo projects: