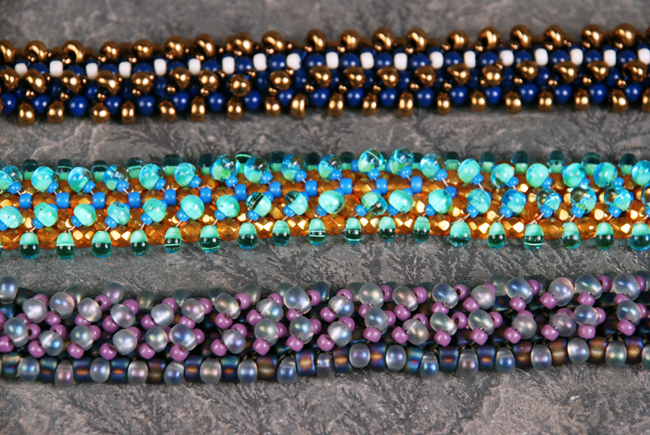
This elegant bracelet is woven together using right angle weave. It is a versatile beading stitch and can be used with a variety of bead combinations. This pattern has been designed for 4mm round beads. The Swarovski crystal pearls are an excellent choice when selecting your materials because of the beautiful color palate available. The bracelet has an interesting spine of 8/0 seed beads that give it a slight curve. It is integrated into the bracelet as the second row of pearls is stitched on. Once the basic framework of is constructed the base is further embellished with Miyuki Magatamas. The Magatamas are in the drop bead family. They have a wider profile than the regular drop beads, measuring approximately 4x4mm. They nestle nicely in between the 4mm Swarovski pearls, both on the top and sides of the bracelet.
Materials:
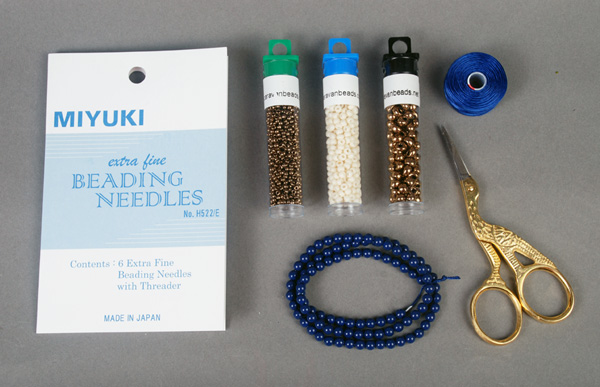
11-457: 11/0 Metallic Dark Bronze Miyuki Seed Bead - 1 tube
8-2021: 8/0 Matte Opaque Cream Miyuki Seed Bead - 1 tube
MA4-457: Miyuki 4mm Magatama Metallic Dark Bronze - 1 tube
29-0434: 4mm Dark Lapis Swarovski Crystal Pearl - 2 strands
193-105: Japanese Thin Beading Needles
CLBD-RO: C-Lon Royal Blue Size D
505-016: Gold Embroidery Scissor
190-005: Gold Filled Box Clasp 2-Strand 7.5x10mm
If you haven't worked with right angle weave before or need a refresher on how to begin, check out our page on right angle weave for instructions.
Begin by pulling out several feet of thread.
**Note: For this pattern you can leave your tail end attached to the bobbin. Right angle weave can be worked from either side so if you run out of thread simply cut a length from the bobbin and begin working on the opposite end.
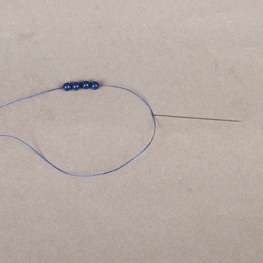
String on four beads.
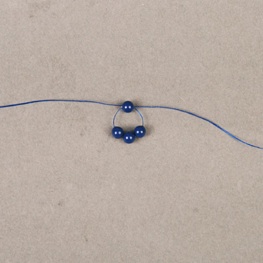
Make a loop by stringing back through one or more beads.
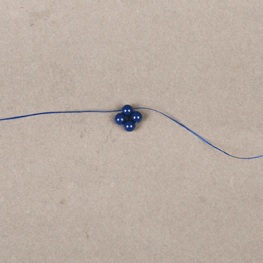
Pull them together so they are snug.
Maintaining even tension while working in right angle weave is important. The beads are stitched together in a looping fashion so it is necessary to insure an even tension after each round of beads added.
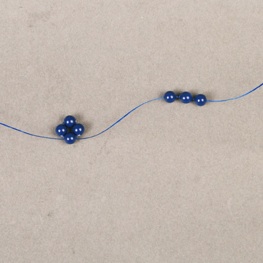
Add three beads to your working thread.
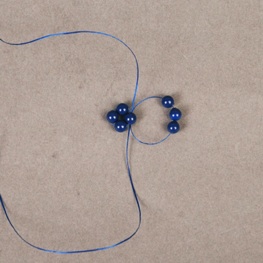
Attach them to the first round of beads while creating a loop by stitching back through the other end of the bead that your thread is exiting.
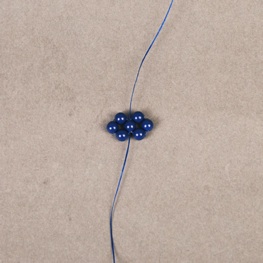
Cinch together the newly added beads.
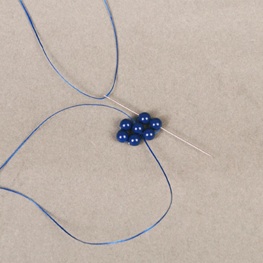
Work your thread over two beads so that it will be in the correct position to add your next group of beads.
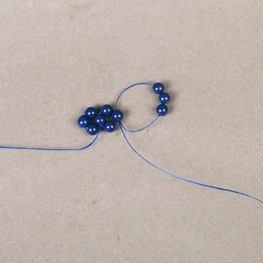
Add three more beads and attach them by stringing back through the bead the thread is exiting.
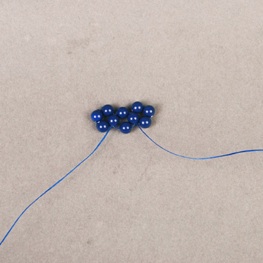
Work your needle and thread over two beads in preparation of adding the next grouping of three.
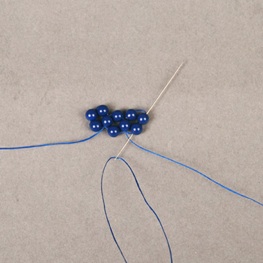
Work your needle and thread over two beads in preparation of adding the next grouping of three.
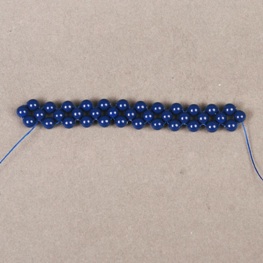
Continue in this fashion until you have reached the desired length for your bracelet.
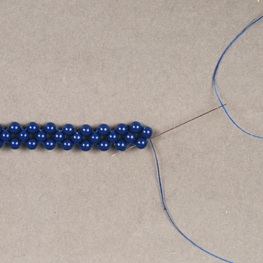
Once this length is reached you will bring your needle and thread into position to begin adding the second row of the bracelet. To do this stitch around so that the thread is exiting the first pearl on the “bottom” of the row of beads.
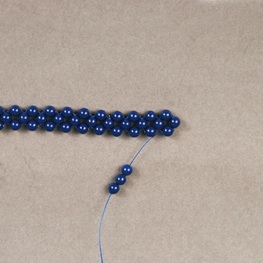
Add three beads.
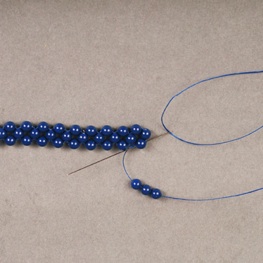
Loop around, stitching through this “bottom” bead to secure them to the bracelet.
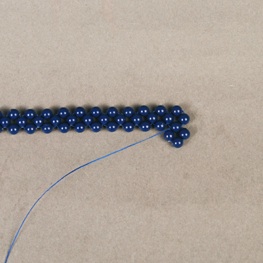
Pull the thread taut to secure.
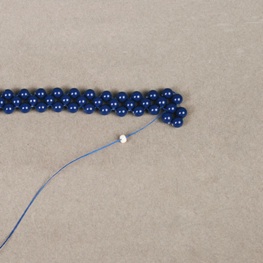
Add one 8/0 seed bead.
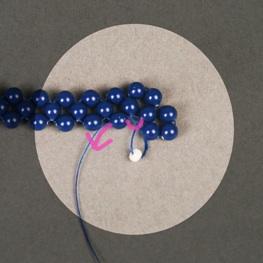
Stitch through the next pearl on the “bottom” of the bracelet.
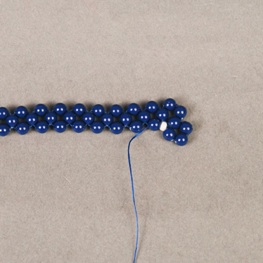
Pull tight to secure.
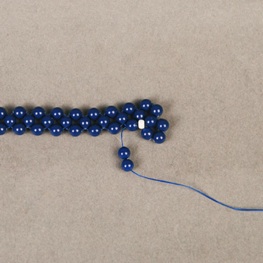
Add two pearls.
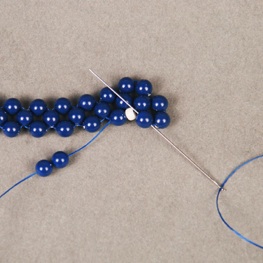
Attach to the bracelet by stitching through the pearl on the right.
**Note that this is one of the three pearls just added in the previous addition not part of the base row of the bracelet.
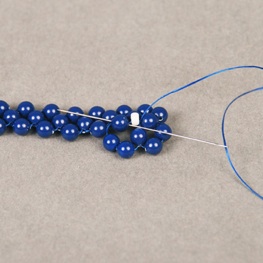
Now
without passing through the 8/0 seed bead, stitch back through base pearl from the original row.
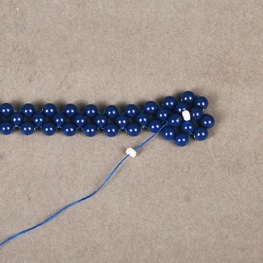
Pull securely and add the second 8/0 seed bead.
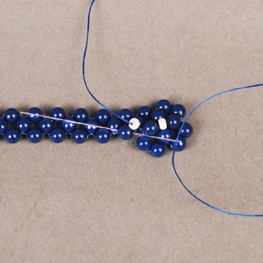
Stitch through the next pearl on the left to set up the correct position to add the next round of pearls.
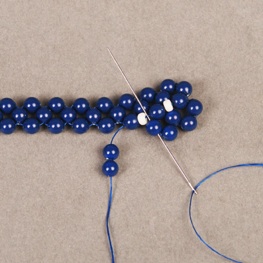
Add two more pearls and attach to the bracelet by stitching through the pearl to the right from the previous bead addition.
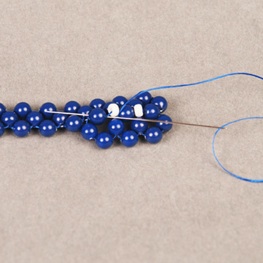
Continue to secure by stitching through the pearl in the base row (to the left of the 8/0 bead) you are working in a counter clockwise motion. Again do not pass the needle through the 8/0 seed bead previously added.
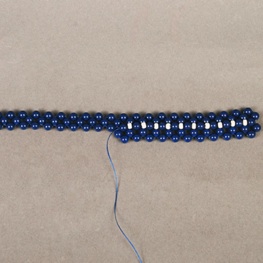
Continue to add beads down the length of the bracelet to form the second row.
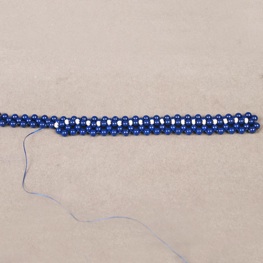
You can see the 8/0 seed beads form a spine and give a raised effect to the bracelet.
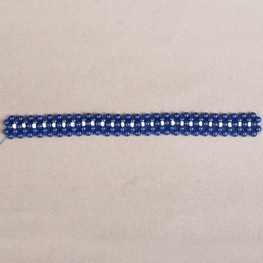
Continue beading until you have completed the second row.
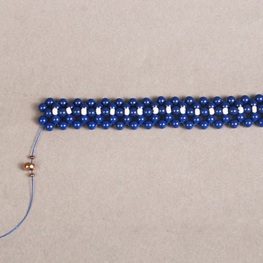
Next we will add the Magatama embellishment to the top of the bracelet. String on one 11/0, one Magatama, and one more 11/0.
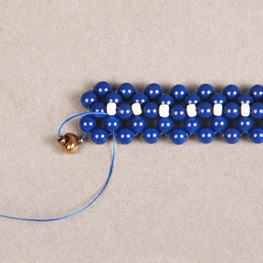
Attach by stitching down through the top of the pearl opposite from the pearl the thread is exiting.
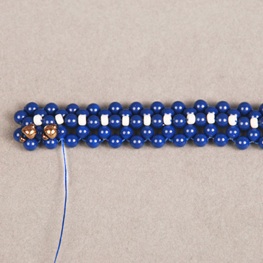
They should sit at a right to left upward slant.
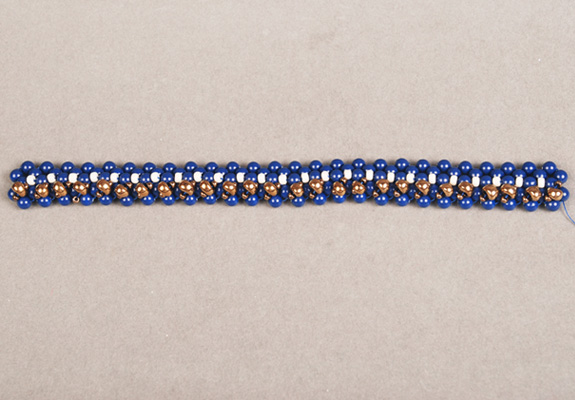
Continue adding the layer of 11/0’s and Magatamas until you have covered one side.
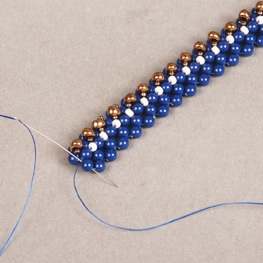
Pass your thread over to the next side of pearls.
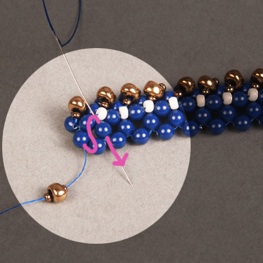
Start the second row of embellishment the same as the first.
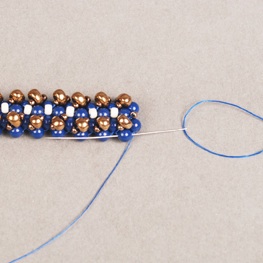
When you come to the end of the second row of embellishment bring your thread to the outside edge of pearls.
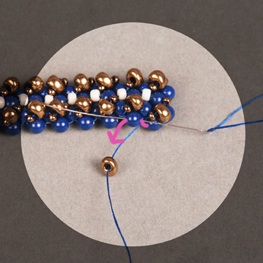
Add one Magatama in between each pearl at the edge of the bracelet.
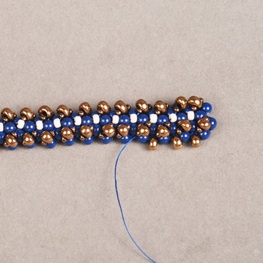
The Magatama should sit neatly in between the pearls at the edge of your bracelet.
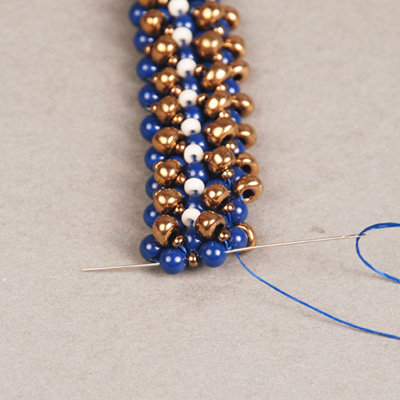
When you have come to the end of one row you can add an 11/0 seed bead between the two end pearls as you work your thread over to the other side of the bracelet.
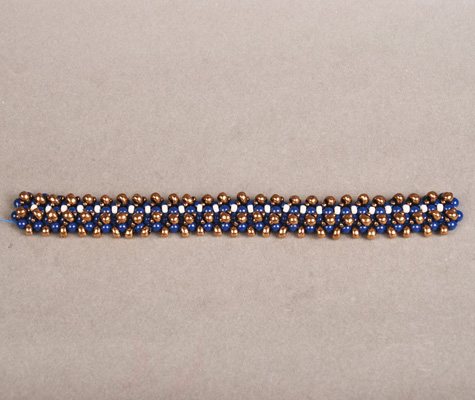
Continue down the entire edge of the bracelet.
Finish the other edge of your bracelet in the same manner.
Sew on the clasp of your choice and stitch in your thread ends.
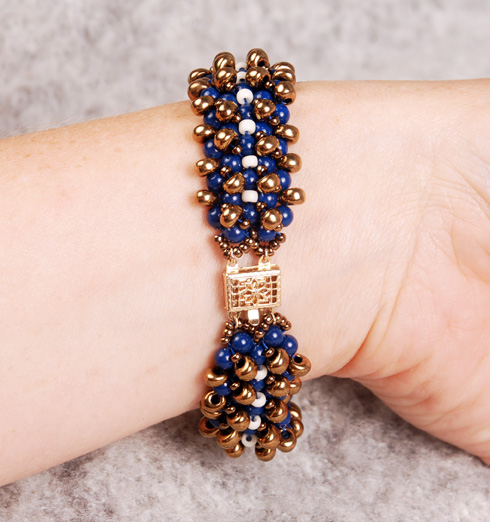
You can also make this project with 4mm firepolish beads, or increase the width by adding an additional row of 4mm beads. If you do decide to make this bracelet wider than two rows I would swap out the 8/0’s that create the spine of the bracelet and use 11/0’s instead. This will create a flatter bracelet that will lay nicely over a wider area.
Other colorways:
Pink and matte silver
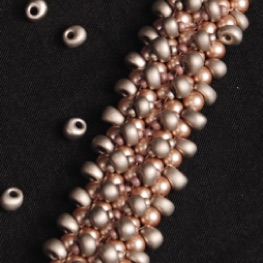
Materials:
11-194F: 11/0 Matte Palladium Plated Miyuki Seed Bead - 1 tube
11-2027: 11/0 Matte Opaque Dusty Mauve Miyuki Seed Bead - 1 tube
(Use 11/0s for the spine instead of 8/0s.)
MA4-190F: Miyuki 4mm Magatama Matte Nickel Plated - 2 tubes
29-0427: 4mm Powder Almond Swarovski Crystal Pearl - 2 strands
193-105: Japanese Thin Beading Needles
MNT-04: Blush Miyuki Nylon Beading Thread
505-016: Gold Embroidery Scissor
190-005: Gold Filled Box Clasp 2-Strand 7.5x10mm
Aqua and Gold
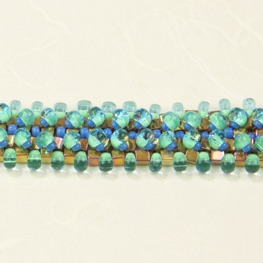
Materials:
11-4484: 11/0 Duracoat Opaque Delphinium Miyuki Seed Bead - 1 tube
8-4484: 8/0 Duracoat Opaque Delphinium Miyuki Seed Bead - 1 tube
MA4-F20: Miyuki 4mm Magatama Mint Green Lined Aqua - 1 tube
SB3-199: Miyuki 3mm Cube 24 karat Gold Iris - 2 tubes
193-105: Japanese Thin Beading Needles
CLBD-GO: C-lon Beading Thread Size D - Gold
505-016: Gold Embroidery Scissor
194-003: 16mm Gold Sand Dollar Button
Lapis and Amethyst
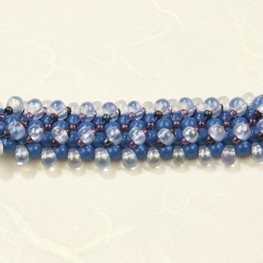
Materials:
11-466: Metallic Dark Raspberry Gold Luster Miyuki Seed Bead - 1 tube
11-312: Amethyst Gold Luster Miyuki Seed Bead - 1 tube
(Use 11/0s for the spine instead of 8/0s)
MA4-2135: Miyuki 4mm Magatama Transparent Light Sapphire Aurora Borealis - 2 tubes
29-0437: 4mm Lapis Swarovski Crystal Pearl - 2 strands
193-105: Japanese Thin Beading Needles
MNT-10: Light Blue Miyuki Nylon Beading Thread size B
505-016: Gold Embroidery Scissor
190-006: Sterling Silver Filigree Box Clasp 2-strand