Tubular Herringbone Stitch
We will be using four colors of bead in our illustrations to help you keep track of where you are in the pattern. If you are having trouble learning this stitch , you may use different colors in your project as well, but it is not necessary.
Add two beads and sew back up through the first bead to begin your ladder.
Sew back down through your second bead and add a 3rd bead.
Loop back through the second bead to continue your ladder.
Go back up through your 3rd bead to secure it in place.
Add a 4th bead, continuing your figure-eight loops to hold each additional bead in place.
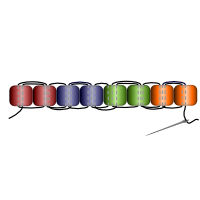
Continue adding beads in the same manner until you have enough for your pattern. Our example shows a tube of 8 beads, but any even number will work.
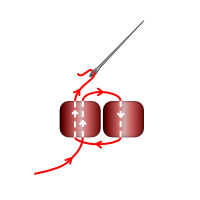
Bring the first and last beads together and circle through them to connect the two ends into the beginning of your tube.
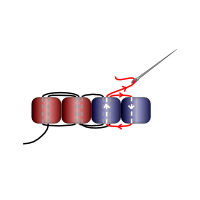
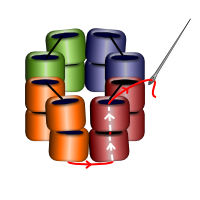
Sew back up through your first bead to begin your second row.
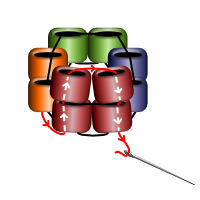
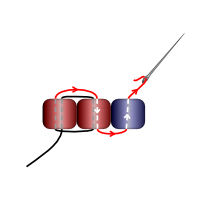
Add two beads, and sew down through the 2nd bead of the first row. You will see the two "burgundy" beads are now sitting above the corresponding two beads of the first row.
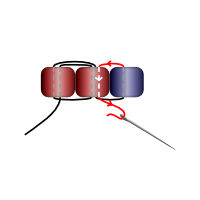
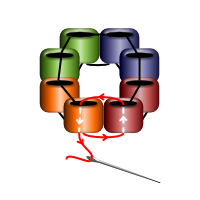
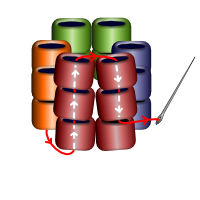
Add two "blue" beads and sew down through the 4th bead of the first row.
Add two "green" beads and sew down through the 6th bead of the first row.
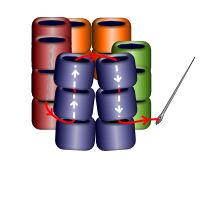
Complete row two by adding two "orange" beads and sew down through the last bead of the first row.
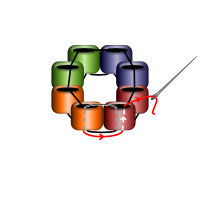
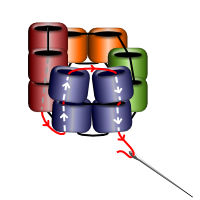
Start row three by sewing up through the first two beads of rows one and two.
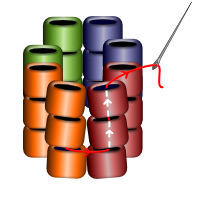
Add two beads and sew down through the 2nd bead of the second row.
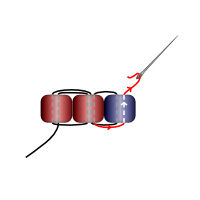
Cross over and sew up through the 3rd "blue" bead of row two. Add two "blue" beads and sew down through the 4th bead of row two.
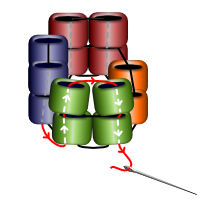
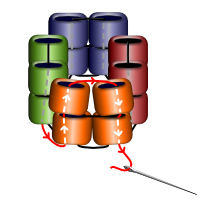
Continue this pattern for each row. You will notice that as you add new rows, your thread will zip together the beads of the row beneath.
Try this tubular herringbone project: